

Let’s continue with reindeer symbols for Christmas with a cute DIY! A little touch of magic and fun for kids, ready made in 20 minutes!
I made different color versions in mint, pink white and brown with a little touch of glitter. I’m going to distribute plenty of those in the coming days!
The idea comes from this vidéo, for a perfect colsplay effect that will, for sure, please the little ones as well! So, let’s go ?


– You’ll need –
- FIMO
- Blank headband
- Glue
- Varnish
- Brush
- An oven

1 – Separate the FIMO in two parts
2 – Cut again in two other parts

3 – Knead the FIMO to soften it
4 – Create two big ball and 4 smaller

5 – Roll your ball and make a tip
6 – Repeat with the secont ball and create two identical curved shapes

7 – With the small balls, create 4 small curved shapes and open the root
8 – Put the small horns on the big ones and take care of the placement

8 – Plaster on the root and smooth it to create a unique horn
9 – Verify both horns to make sure they have the same design and re work on it if necessary
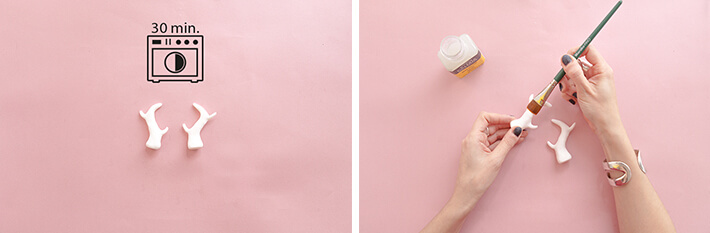
10 – Put the horns in the oven, at 110°C during 30 minutes
11 – Varnish your horns and wait until it dry completely.

12 – Put the horns on the headband to calculate the placement approximatively

13, 14, 15 – Glue the horns…

And thats’it ! You’ready!
I kept the headband blank in purpose, to keep it discreet and bring out the horns, but of course, you are free to dress your headband with ribbons or so, and add sparkles for a festive glitter touch 🙂

